Given the weather and impending public holidays, personal and family comitments have meant the 'project' is on hold until normal service is resolved.
Thankfully we're away for the festivities, so will not be eating turkey amidst this chaos.
Friday, 17 December 2010
Sunday, 12 December 2010
Kitchen progress
S spent the weekend with the tile cutter, and managed to produce this:

Pretty good eh? Actually starting to look like a kitchen.
The 'feature wall'
Earlier in the week we had an attempted delivery for the glass blocks, so thursday evening we took a detour on the way home to collect them from the delivery depot.
 So today I got the glass blocks out, as you can see by the photos about a day will get you a glass block window. Its constructed with the bocks on extruded PU spacers that are glued in place with a funky smelling adhesive. It'll take a couple of days to cure properly, but even freshly built it's quite sturdy.
  I'll probably grout it next weekend, but in the meantime I've got a few gaps & holes to fill around the frame. There's also about an inch gap at the top which I'll try to wedge a bit of wood into and then fill/plaster over. The blocks are slightly narrower than the wall thickness, and also don't run parallel to the wall (the wall is far from straight/vertical) so there's going to be some creative plastering going on in that corner.
Tuesday, 7 December 2010
The last of the demolition?
Got my favourite tool out on sunday - the SDS drill/chiseller.
The intention was to prepare the hole/opening along the side of the stairs for a glass-block panel. Before and after photos follow:

 Now that this has been done, the theory is there's no more messy/dusty work to be done. Apart from a small amount of plasterboarding, and lining the 'narnia' cupboard with timber & insulation. Oh, and levelling the floor.. hmm.
The intention was to prepare the hole/opening along the side of the stairs for a glass-block panel. Before and after photos follow:

Irritatingly an overgenerous mortar joint messed up the third 'step' but beyond that I found that the cinderblock is actually quite easy to work and get a fairly accurate cut
So the steps are pretty much where I want them. However it has yet to be seen if they are where they need to be. Glass blocks should arrive this weekend, then I'll find out.
 Now that this has been done, the theory is there's no more messy/dusty work to be done. Apart from a small amount of plasterboarding, and lining the 'narnia' cupboard with timber & insulation. Oh, and levelling the floor.. hmm.
Sunday, 5 December 2010
Plastering!

 Despite my desire to plaster in daylight, it was dark by the time I'd started. Small details like trying to find enough drywall boxes, then going out and buying drywall boxes, clearing enough space to work, disconnecting and removing light switches and sorting some unrelated electrical niggles, all conspired against me. Despite this by the following morning plaster was drying nicely.
Yeah.
Friday, 3 December 2010
Master bedroom boarded
I'm definitely getting quicker at this plasterboard business.
Master bedroom done in 2 evenings. Admittedly it's not the most challenging of walls, with only 6 openings for sockets, but it's good to get it done, and all the leftover board back downstairs.
This means I can plaster on saturday, in daylight for a change, hopefully with outside temperature above freezing, I don't fancy cleaning my buckets & tools with ice.
Thursday, 2 December 2010
Another milestone: another room done
Finished the 3rd bedroom last night!
Finished wall papering on sunday evening, then the floor was put down on monday evening - cheapest laminate possible, but went down quick enough, over a foil & foam underlay. The last row was fun as it was against the wonky wall - over the 9ft length of the room it runs out by over 3". Skirting went down last night and tuesday. So now the room is useable. There's a few snags, but nothing that can't be sorted retrospectively. The room barely had time to 'settle' before I'd started filling it with boxes:
 Moving some of the junk that was in the master bedroom into the 3rd bedroom means I can start on getting the plasterboard on the wall in there, then a skim of plaster, wallpaper and we can get the electricians back to finish second fix.
We need to collect the living room chairs this evening, as we've been putting it off for months and Furniture village have finally given us a deadline as they need the space for christmas stock.
They'll stay in their boxes until the living room floor is down. Hopefully before the holidays though. We'll see how the weekend goes.
Friday, 26 November 2010
Hob and heater now working..
After the previous evenings efforts I opted to wait in this morning until the gas fitter arrived, just so I could brief him on what I'd done and make sure everything is acceptable. He seemed happy enough when he arrived, despite there not being quite enough copper pipe to do both gas and heater in the house. Also the electrician was there to fit the socket front for the hob supply (it had previously been left off due to a lack of space to work beind the carcass). Whilst he was there he also fitted the isolator switch for the cooker, which now means that as of this evening we have a working hob, oven and kickspace heater.
The hob has an auto-igniter which has a flame sensing safety interlock. I'm beginning to hate this already as when the hob is cold you need to hold the knob down to keep the interlock override on for a good few seconds. I much preferred the manual pushbutton igniter on my old hob/oven, even if it did give me the option to gas myself. meh.
The hob has an auto-igniter which has a flame sensing safety interlock. I'm beginning to hate this already as when the hob is cold you need to hold the knob down to keep the interlock override on for a good few seconds. I much preferred the manual pushbutton igniter on my old hob/oven, even if it did give me the option to gas myself. meh.
Thursday, 25 November 2010
Preparing for Hob installation
I prepared the 2 base units in question by cutting holes in the back - the one under the hob had a hole already for the electrical connection, though this needed to be enlarged to allow the gas pipe through as well - irritatingly Hotpoint have moved the gas inlet between the 2 models. I'd have preferred it on the other side as it's now right in front of the electrical supply on the wall. The other base unit (to the left) is under where the gas pipe drops, and behind it is now the isolating valve for the gas supply to the hob. I cut the hole quite generous for this as once the worktop was glued down the base units weren't moving and the poor gas fitter had to somehow manoeuver a couple of bits of 15mm copper pipe into the 40mm gap behind the base unit. I also notched the sides at the back to allow the pipe to pass.
The worktop was carefully measured and then cut to the dimensions of the hob using a router I'd borrowed off a mate. (during this the dyson overheated and died -argh!) The position was worked out to allow the gas supply to drop inside the base unit (rather than behind the back board) to allow easier access. With the drawers in there's about 30mm behind the rear of the drawer for the gas connection - plenty. This did however, push the front of the hob quite far forward - leaving it about an inch from the post-formed edge. Not a problem in itself, though the fixing clamps for the front of the hob now foul on the cross-brace that supports the base unit sides at the front. Oops. Reluctant to remove the brace (knowing how tightly wedged the base units are, I had visions of the sides being pushed in and the drawers jamming) I opted to put a pair of holed under the clamp mounting holes on the hob. Bin the clamps and put a slightly longer screw into the hob with a large washer to catch on the underside of the crossbrace - much tidier.
Once the base units were cut they were replaced in position and the freshly routed out worktop was then repositioned in it's final resting place. Despite the fact that the dog-bone worktop joint bolts say they're not suitable for a trend-jig cutout, I found they still fitted, so in they went. A tube of jointing/filling compound was squirted over the cut ends of the mitre and the worktop was then bolted together. A quick rub over with the solvent removed the excess and I've now got a nearly-tidy worktop joint.
 At the same time I also cut the hole in the plinth for the kickspace heater. To support the heater in situ I screwed a couple of bits of batten to the back of the plinth that sit unde the heater keeping it at the right hight. The flexi hoses that come with the heater are a bit short, so I think the 2 spurs that are under the corner unit will need extending with copper pipe before being connected. Likewise the power lead is shorter than it needs to be. Arse.
 Lining the hob up in it's intended hole has highlighted the poor build quality of this hob unit as well. Even screwed down there's a gap of a couple of mm all around where the top surface doesn't reach the worktop. This is poor, Hotpoint.
The worktop was carefully measured and then cut to the dimensions of the hob using a router I'd borrowed off a mate. (during this the dyson overheated and died -argh!) The position was worked out to allow the gas supply to drop inside the base unit (rather than behind the back board) to allow easier access. With the drawers in there's about 30mm behind the rear of the drawer for the gas connection - plenty. This did however, push the front of the hob quite far forward - leaving it about an inch from the post-formed edge. Not a problem in itself, though the fixing clamps for the front of the hob now foul on the cross-brace that supports the base unit sides at the front. Oops. Reluctant to remove the brace (knowing how tightly wedged the base units are, I had visions of the sides being pushed in and the drawers jamming) I opted to put a pair of holed under the clamp mounting holes on the hob. Bin the clamps and put a slightly longer screw into the hob with a large washer to catch on the underside of the crossbrace - much tidier.
Once the base units were cut they were replaced in position and the freshly routed out worktop was then repositioned in it's final resting place. Despite the fact that the dog-bone worktop joint bolts say they're not suitable for a trend-jig cutout, I found they still fitted, so in they went. A tube of jointing/filling compound was squirted over the cut ends of the mitre and the worktop was then bolted together. A quick rub over with the solvent removed the excess and I've now got a nearly-tidy worktop joint.
 At the same time I also cut the hole in the plinth for the kickspace heater. To support the heater in situ I screwed a couple of bits of batten to the back of the plinth that sit unde the heater keeping it at the right hight. The flexi hoses that come with the heater are a bit short, so I think the 2 spurs that are under the corner unit will need extending with copper pipe before being connected. Likewise the power lead is shorter than it needs to be. Arse.
  Lining the hob up in it's intended hole has highlighted the poor build quality of this hob unit as well. Even screwed down there's a gap of a couple of mm all around where the top surface doesn't reach the worktop. This is poor, Hotpoint.
Now it's over to the professionals..
Sunday, 21 November 2010
Another weekend, still no floor
 Saturday AM(ish) S got to work painting the ceiling in the 3rd bedroom then started cleaning up all the woodwork for a coat or two of gloss paint. I finished putting all the handles on the kitchen cupboards (apart from the one where we're short a door) and fitted the pelmet lights The wiring for which passes up the back of the wall cabinets in the slim void behind the back board to the transformer. I'll fit the pelmet boards once the tiling is done. The transformer for the lights will sit on top of the wall cabinets, behind the cornicing, and is switched via one of the kitchen lighting circuits.
 I also managed to track down the elusive little bit of plumbing required to allow me to complete the plumbing under the sink. The kit that came with the kitchen didn't seem to have the right bits to joint 2 outlets at different heights, and kitchen plumbing has a few conventions that defy logic (a different thread on sink outlets to the rest of the system -for example). Up to this point the half-basin drained into a margarine tub, which required frequent emptying (into the correct bowl!).
We've decided that I'm to build a narrow wine-rack that will sit in the gap behind the breakfast bar this will fill the gap nicely, and give us a useful wine storage solution that we'd otherwise have to put in a cupboard somewhere.
I also fitted some more outside electrics - the 2 PIR sensors for front and side lights, and the front dome light. Just the light by the back door and the front power socket to do - the front socket I want to flush into the brickwork, which will be a challenge, as being weatherproof, it is quite bulky.
 The 'Narnia' cupboard was also emptied to allow me to get in there to line it with more accoustic stuff, and finish off positioning the electrical services for the electricians to terminate. The contents of Narnia is now mostly under our bed in the spare room -how many people can say that? The intention for that cupboard is for storage of CDs and dvds, though to keep future options open I'm putting lights, power and Cat 5 data sockets in there.
We managed to get the boxes containing the wardrobes and bed-frame upstairs (no mean feat at over 40Kg and 2m long). Then the sofa (still boxed) was plonked on one of the recently liberated wheel-boards. This enabled me to get to the end wall of the dining room, this is one of the last areas downstairs needing plaster, so was keen to do that corner as now the dining room can be papered.
As S spend most of saturday painting, sunday she could start papering the office. We'd chosen a coloured and textured wallpaper again (reminded me of lemon meringue) however as it was going up we were a bit concerned to see the patchy blue paint of the original wall through it - we checked again this evening when the paste and paper has properly dried, and thankfully the patchyness has gone -we were hoping we wouldn't be needing to paint as well as paper in every room. I've also discovered the importance of batch numbers, as we have 2 slightly different shaded of yellow going on in there.
I avoided cutting the hole for the hob. I've decided to leave it as late as I can as we're finding the additional uninterupted worksurface useful. Need to chase the gas fitter on that one.
This coming week will hopefully see a bit more progress, I still have to level the floor in the front room, not totally decided how I'm going to achieve that yet, lots of latex levelling I'm guessing.
Thursday, 18 November 2010
More second fix materials delivered
Also recieved the second part of the second fix order - this time mostly the decorative styled socket outlets, plus also a couple of bits that were missing from the first part. Irritatingly the suppliers seem to have forgotten a bunch of switched spurs. This is a nuisance as they're on the kitchen ring. Managed to get through (eventually) and had a promise that they'd look into it. I'm starting to realise why this particular supplier is so cheap. The products are fine, the service is poor.
I also need to order a different face-plate and switches for the living room lights. I've got a double gang socket, where I only need a single. Maybe I'll put a pair of dimmer modules in, they're twice as wide.
I also need to order a different face-plate and switches for the living room lights. I've got a double gang socket, where I only need a single. Maybe I'll put a pair of dimmer modules in, they're twice as wide.
Another hob
Recieved the second hob this evening at work. Late but intact.
It's the next model up from what was originally ordered, as it seems to be hard to find the original for sale online now at sensible money, and this model is actually cheaper from some places. On seeing one in a showroom a while back S noted that it also looked nicer.
Will be fitting it hopefully at the weekend.
Monday, 15 November 2010
Back to civilisation
The weekend saw a milestone reached - we have actually assembled the bed in the spare room. After S had laboured throughout the week to get the walls papered and painted, I fitted the carpet and skirting over the weekend. With the exception of curtains, second fix and snags, the room is done! So we moved out of the box room (soon to be office) assembled the bed and went back to joining a large majority of the population by not sleeping on the floor.
I did learn a valuable lesson on sequencing, skirting goes on before carpet, and definitely before gripper-strip. There is nothing more painful than trying to fit skirting-board whilst having your fingers shredded by gripper-strip.
I also took advantage of a break in the rain to fit the external lights down the side of the house - nothing exotic, just a line of cheap bulkhead fittings with a PIR at the end:

Sunday, 14 November 2010
Kitchen taking shape
I got the breakfast bar cut to size, mitred and approximately located - I can't fix it down properly until I've cut the hob into the other worktop and the gas supply has been finished. I'm still waiting on hotpoint to deliver the replacement, should be later this coming week. I've cut the end of the breakfast bar square, but after snagging my sweater on it a couple of times yesterday I'm tempted to radius the corners off a bit, though I'm not sure how tidy that will look once I've stuck on the end-cap stuff, it's not the horrid iron-on stuff I once tried using, you've got to glue it with impact adhesive, but I can't help thinking that it'll end up un-peeling itself. maybe I can get something metal..
The door/drawer handles are slowly starting to appear on the units as well, I do a couple a night as it's nice, unstressful work to help me wind down.
The door/drawer handles are slowly starting to appear on the units as well, I do a couple a night as it's nice, unstressful work to help me wind down.
Wednesday, 10 November 2010
Oven and wires
In an effort to avoid plastering last night I fitted the oven instead. We had an electrician come by yesterday and start second fix - he found a bag of scruffy second hand sockets donated by a work colleage and proceeded to fit them around the kitchen. I had the foresight to get a few specialist connections, such as a couple of 45A hob/oven wall terminations, as well, and after his efforts we now have fixed power in the kitchen, and no other obstacles to getting the oven out of its box and fitted into it's housing.
Also spent an hour or so locating the wiring for the dining-room light. This had been previously lost once the plasterboard went up on the ceilings, with only a few cryptic marks on the walls to indicate where it might be. After some careful measuring and consultation with S as to where the light is actually wanted I put a 25mm hole in the ceiling adjacent to the joist carrying the wires.
The problem now was getting 4 bits of 3 core t&e through this hole. The floor directly above this point is the bathroom, which is tiled, and not coming up whatever the excuse. However the hallway adjacent to this has currently got exposed floorboards, and the run of the joists allowed me to reach along the void to the area above the hole.
The problem is, in fitting the plasterboard, one of the wires has been trapped between board and joist. After a lot of cursing and a fair amount of brute force (applied at arms length) I managed to free the trapped wire, and then it was simply a job of feeding the ends through the hole. We now have a spider of t&E hanging from the ceiling.
Meanwhile S has been labouring in the back bedroom, and it's now pretty much totally covered with lining paper. Result.
Monday, 8 November 2010
How useful is home delivery?
A rant.
Why do retailers think they're doing us a favour by selling us products with 'free home delivery'? As most of us may be aware, most delivery agents don't work weekends, so what they're actually saying is we'll deliver to you at home when you're most likely to be at work. Maybe I'm assuming too much by the fact that most of us still go to work during the day, but I think for an average household this is still the case.
Some of us are lucky enough to be able to work somewhere that will accept deliveries on your behalf, but if recent experience shows, this doesn't always make for an easy life. We were hardly in a position to open and inspect a pile of kitchen appliances in the rain in a car park. Neither were were able to sign for the goods un-opened.
So what's the solution? Evening deliveries? Weekend deliveries? All of this is achievable, even if it adds another £10-£20 to the price, it'll still be cheaper than paying high-street prices.
Running water
 Despite all the plastering I need to be doing, the weekend was spent in the kitchen, and as a result we now have running hot & cold water, and a mostly functional waste system.
I hired a worktop jig & router from a tool hire place near work and after buying a new cutter for the router (£25!!! - the hire of the router & jig only came to £30) was ready to begin.
The main length which runs across the width of the kitchen is a single, wall-to-wall length. Given how un-straight and un-square the house seems I took a punt that the false wall would be straighter, and was correct, however it's still not square. After taking a few measurements, I cut the worktop to what I hoped would be the correct size. Far from it. Despite comparing the diagonals, I've now come to the conclusion that the worktop/wall area is skewed slightly. Cutting a 15mm wedge from one end ensured a fit square and flush with 2 walls, but leaving me out by 10mm at the other end. I think creative tilling should be able to solve that one.
I cut the female side of the mitre into the main length with the router and jig, and then rougly cut the second length so it'd fit in the gap and I could then line that up. Likewise it was slightly skew, but as it was shorter than the overall space, I could change it's orientation to get the best fit. I had to route a few mm off the back edge to accomodate a slight bulge in the wall and then mark it for the male end of the mitre.
Cutting the worktop is hard work with the router. I did a test joint first on a bit of old worktop to be sure I understood the principals of making the joint and using the jig. This worked fine apart from a clamp slipping slightly, however it also took the edge off the cutter in the router. It appears your typical laminate kitchen worktop has quite a high quantity of resin/glue in it, and also is of varying density, it's denser at the top & bottom edges. The upshot of this is that as the job progresses, and the cutter gets blunter, the first and last pass of the cutter gets harder. Towards the end of the weekend I wasn't so much cutting the worktop as burning a hole in it.
So after effectively 2 mason's mitres, tidying up an L-shaped cutout I (foolishly) did with a jigsaw, and cutting the hole for the sink, the cutter was pretty much finished. I also had to put a small rebate on the underside of the main run to allow for where I'd tiled too far up the wall under the worktop. I did this with the circular saw, rather than endure the pain of coaxing a blunt router along 2.4m of dense, resin impregnated chipboard.
I'm very pleased with the mitre joint - it fits together exactly, or will do once I level the second worktop, however that needs to come out to have the hob cut in and fitted. However I did suffer from poor planning which had me cutting the joint upside down (or right side up), hence the router was spinning the wrong way which caused the laminate to lift on the front edge. Hopefully I can fix that with one of the (too many) colour-fil packs we were sold. You live & learn.
Fitting the sink was more frustrating than it should have been, I'd gotten the hole cut mm perfect, and in just the right place, however despite this the claw-clamps that hold the sink down are obstructed by the carcass beneath both front and back. I got the front fixings in by dismantling the carcass in-situ allowing access to front clamps, which I had to chisel out rebates for to allow refitting of the front support. I gave up on the back fixings, even if I could rebate the worktop to allow the clamp to fit over the carcass, I'd never be able to get a screwdriver on the clamp to tighten it.
The taps went in fine (hooray!) however the waste kit that we were supplied doesn't have enough or the right type of fittings to connect 2 bowls that are at different heights. Additionally the height of the waste outlet puts it a little too low for a conventional P-trap, so I had to send S out with a list of bits I thought might work (this was the night before I'd actually fitted anything). Even with the the bits I requested I still couldn't get it to fit together, as the pipe in the kit is slightly larger than the standard 32mm waste pipe, so none of the additional bits fit where I wanted them to. AArgh.
At about 11pm last night I suceeded in getting the main sink draining properly (albeit slightly uphill) and the half sink currently drains into a margarine tub.
At least we don't have to go outside to draw water, or dispose of it.
I celebrated by doing the washing up in the new sink. S had had enough of my cussing by then and had gone to bed.
In addition to our new running water in the kitchen, it appears we also have running water in the loft. The chimney stack has a leak somewhere. One step forward, one back.
At this stage, I'm not sure if it's the flashing, brickwork or the flaunching, but under heavy weather it's letting a small trickle of water down the side of the stack in the loft, which is slowly soaking the ceiling joist, and now the recently plastered ceiling in the master bedroom. We've got a roofing/chimney guy coming by tomorrow to take a look at the problem, and then we'll take it from there.
Saturday, 6 November 2010
Hob trouble again
Not more trouble, just the same stuff.
On closer inspection of the damaged corner it looks like it's been damaged prior to packing, as the metal is scratched as well as bent, this wouldn't be able to happen whilst in it's packaging.
I managed to straighten out the bend, but the top surface is still deformed, and scratched, which will be a dirt-trap.
On this basis we've decided to try and find a replacment, and dispose of what we have on ebay. S spent a merry couple of hours trawling around various high-street stores to see if there was anything we could buy and fit this weekend- alas not. Looking online has found the next model up, for less that we paid for the original, so we'll chase that - just as soon as I know how soon we can get it..
Friday, 5 November 2010
a quick word
I'd like a quick word with whatever sadistic indvidual put the 2" oval nails in the bottom of the door surround i've been trying to shorten.
My saw is now lacking a few teeth.
My saw is now lacking a few teeth.
Hob trouble
 Finally got around to unpacking the hob last night, mostly to check what connection was needed for the power hook-up (13a plug, it sems) plus also to check the type of gas connection.
Despite the fact the packaging was intact, the corner of the hob had clearly recieved a knock, and was bent over.
That ain't going to fit without help.
Of course, having bought it so long ago, the retailler isn't interested in exchanging it, though they did offer a £25 goodwill cheque - thanks Argos.
That leaves us with 2 options, try to straighten it, or get another one. That'll be another £170quid or so. Ouch.
I'll be getting the hammer out this weekend.
Thursday, 4 November 2010
A Few bits
Bought myself some new side-cutter this evening, along with a set of saw-horses and some second fix bits to help push the kitchen along - hopefully get an afternoon out of the electrician to install these little bits.
 Also arranged hire of a worktop-jig and router for the weekend - cheaper than paying a pro, and it gives me another excuse to wreak havoc and distruction with power tools. Read a few tutorials and vids online and a masons' mitre, or butt & scribe joint doesn't look that difficult once you understand how the jig works.
 Also arranged hire of a worktop-jig and router for the weekend - cheaper than paying a pro, and it gives me another excuse to wreak havoc and distruction with power tools. Read a few tutorials and vids online and a masons' mitre, or butt & scribe joint doesn't look that difficult once you understand how the jig works.
 Of course that would be in a kitchen that's square.
The reality will be another thing, but getting the worktop fitted will then enable the sink to be installed negating the need to draw water from the outside tap, or washing machine feed hose.
Wednesday, 3 November 2010
More plastering
Managed to plaster the chimney-breast in the living room last night. Didn't achieve much more as once again for an hours work I spent 3 hours moving stuff around.
Still haven't found my side-cutters.
Still haven't found my side-cutters.
Tuesday, 2 November 2010
plastering the sitting room
As much as I'd like to put it off, I've got to get the plastering (at least) done before I can think about laying floors.
My brother kindly offered to stop by after work to help, so the pair of us started on clearing a space then trimming out some edges with beading before mixing up half a bag of multi-finish to skim over one of the larger wall segments.
Trimming the beading to fit proved more challenging that it should have been due to my side-cutters going for a walk. Using a cheap halfords combination crimper to cut galvanized corner beading is not a pleasant experience. A hacksaw is out of the question, it's like cutting chicken-wire. Suprisingly tough.
S must have spent several hours looking for the wretched cutters on my behalf (she hates to hear me bitching, and when I fail to find things accuses me of having a 'boys look'). I'll look again tomorrow.
Monday, 1 November 2010
Kitchen assembly
 Given that the floor is down, walls are papered and painted in the affected areas I figured I was running out of excuses not to start assembling the kitchen.
I started in the corner with the wall units, and worked my way along. I picked a height (not out of thin air, honest) for the fixing, and levelled all the units to that height.

After fitting all the wall units I decided they had to come down again to allow me to drill holes for cable to feed the low-voltage pelmet lights that will sit under the bridging and corner units. The transformer will live on top of the units, which is where the T&E supplying it currently rests. The holes are in the top and bottom boards, right at the back, allowing the cable to run up in the shallow void behind the backboard. To ease installation I threaded some builders string through both holes, taping it onto the top to secure it.
Once the wall units were up and leveled I then fitted the extractor hood, getting that on the wall and out the way. I'm going to have to do something creative with the upper cover, as the securing method is poorly thought out at best, and definitely won't work with the duct where it is.
Base carcasses then followed, I wanted to be sure they'd fit, as I suspected the dimensions along the chimney wall would be tight. They were. Chisel a few low level tiles off the end wall and the units now fit, highlighting how out-of-square the side of the chimney breast actually is. I blame the person who plastered it.
The following day doors started going on, mostly to reduce the quantity of unopened cardboard boxed around the house.
Wednesday, 29 September 2010
Kitchen floor down. At last.
 Finally got the floor down. The tile adhesive did a good job of absorbing the unevenness left by the unlevel self-leveling. However my non-uniform application of the adhesive has left a couple of tiles with slight height differences. We're talking mm here, but it's something I'll notice because I know it's there. We'll see what others think, assuming they are't simply too polite to mention it.
Monday, 6 September 2010
Another big delivery
Had all the wood flooring, underlay, kitchen tiles, fire-surround, and a few other bits on order from our DIY supplier, this was scheduled to arrive this morning, so a half day's holiday was booked for me to recieve it, and move it into the house. Somebody's timing slipped a bit and the truck didn't arrive until after lunch, once again blocking the whole estate for the few minutes required to crane the large palletload of stuff into the front garden.
Once it'd been shifted inside most the day was gone, so I called the office explaining the change of plans and then set to getting some more plasterboard attached to the walls.
Once it'd been shifted inside most the day was gone, so I called the office explaining the change of plans and then set to getting some more plasterboard attached to the walls.
Thursday, 2 September 2010
Kitchen has arrived
 Yup, the kitchen has arrived. Delivered just after lunch, and now sat on my remaining wheel-boards in the dining room.
The kitchen can't be fitted until the floor has been levelled, and tiled.
The tile are 600x600mm porcelain, heavy and need to be wet-cut.
Tuesday, 31 August 2010
Kitchen wall boarded -finally
I've finally gotten the last of the kitchen board up, along with removable panel, low level sockets for the appliances, high level sockets, and fairly well fixed plumbing, albeit pointing in different directions to originally intended. There's a
small problem of a waste pipe fouling a socket, but that's not insurmountable, it just needs extending slightly. The house has also been tidied, all tools gathered and relocated, again, this time to the office, which isn't getting an accoustic wall.
All in all I think I've learnt a lot this weekend that will help speed the false wall installation in the rest of the house, the kitchen was by far the most complicated, and would have benefitted from slightly better planning, but the end result isn't too much of a compromise, and will largely be hidden from view anyway.
Sunday, 29 August 2010
plumbing arg!
Still struggling with the plasterboard in the kitchen, having found that the drywall electrical boxes wouldn't fit on the plasterboard with the OSB behind it, so I then had to remove the plasterboard (again) and chisel out 'wings' in the OSB to allow the clips to sit behind the plasterboard.
I then had the spigots for the water pipe to solder the elbows and joints onto, this itself was difficult in keeping the pipe flush to the wall I had to put the solder joint tight up against the
plasterboard. I then realised that I hadn't allowed enough space between the pipes to allow the flared fitting of the appliance hose, thus I had to rotate the hot water fitting away to run horizontally (I'd originally wanted them both to hang vertically). Now they fouled the waste pipe for the appliances. I gave up and went to bed at that point.
cladding the walls

Finally getting some walls clad, whilst was S cutting and installing the accoustic fiberglass
into the frame in the kitchen, I cut the OSB chipboard and then the (accoustic blue) plasterboard to go on top. That was a challenge in itself, as the kitchen wall is quite busy with water & waste pipes, as well as electrical & data outlets, the pic to the left shows the wall before the board goes up, the data outlet is on the right with the white tubing dropping from above.
I'd originally intended to do the wall with the smallest number of joints in the board possible, however a small element of doubt over the integrity of the waste pipe (turned out to be justified, I'd forgotten to glue one joint) caused me to rethink that plan and fit a removable panel over the waste pipe in the bottom right corner.
Most of the OSB was up by the end of saturday. S, having run out of walls to lag started removing the plaster from the chimney breast in the sitting room, she quickly found how effective the SDS drill is on this task, and had the wall bared in very little time. This will
enable us to batten and board the breast wasting as little space as possible, most the plaster was loose anyway, so now the board can be closer to the brickwork.
Friday, 27 August 2010
Ceilings boarded
I'd taken wednesday, thursday & friday as holiday to assist the plasterer in fitting the ceiling boards, given their size (8x4) they're more than one person to handle, so a second pair of hands
would have been needed. Wednesday was to finish off all the little jobs that were required before the ceilings could go up - largely connecting data socket positions via 20mm conduit to a location in the airing-cupboard so I can pull cables to the sockets later, also little things like completeing the installation of the cooker extract ducting.
My brother also popped by and we removed the patio door dividing the living room and the dining room, more suprises were unearthed, amongst them a really nice hardwood frame (sadly useless to us) wierd glue still semi-fluid, and yet more carpet under the footboard. Still not sure what to do with the patio doors, they're currently parked around the side of the house, awaiting inspiration/sale/destruction.

 The ceilings went up largely without incident, though we did discover one joist was of unusual toughness and just snapped all the screws we tried driving into it. Thankfully they were mostly level (only one or two were a bit high), though of differing spacing, so each board needed to be cut at least once to finish on a joist (the idea is that the imperial sized boards will fit onto ceiling joists without needing to be cut - yeah right..)
So by the end of friday we had ceilings - already a change could be felt, especially for the cat who was quite unnerved by the sound of someone moving around on the floorboards upstairs. Unfortunately we're still largely without lights downstairs, and will be until second fix gets the lighting circuits terminated. We have several useful shaped offcuts and also a whole sheet of ceiling board left over, which will be useful in doing the ceilings over the stairs and the porch. I'm glad I over-ordered, rather than under ordered.
would have been needed. Wednesday was to finish off all the little jobs that were required before the ceilings could go up - largely connecting data socket positions via 20mm conduit to a location in the airing-cupboard so I can pull cables to the sockets later, also little things like completeing the installation of the cooker extract ducting.
My brother also popped by and we removed the patio door dividing the living room and the dining room, more suprises were unearthed, amongst them a really nice hardwood frame (sadly useless to us) wierd glue still semi-fluid, and yet more carpet under the footboard. Still not sure what to do with the patio doors, they're currently parked around the side of the house, awaiting inspiration/sale/destruction.
 The ceilings went up largely without incident, though we did discover one joist was of unusual toughness and just snapped all the screws we tried driving into it. Thankfully they were mostly level (only one or two were a bit high), though of differing spacing, so each board needed to be cut at least once to finish on a joist (the idea is that the imperial sized boards will fit onto ceiling joists without needing to be cut - yeah right..)
So by the end of friday we had ceilings - already a change could be felt, especially for the cat who was quite unnerved by the sound of someone moving around on the floorboards upstairs. Unfortunately we're still largely without lights downstairs, and will be until second fix gets the lighting circuits terminated. We have several useful shaped offcuts and also a whole sheet of ceiling board left over, which will be useful in doing the ceilings over the stairs and the porch. I'm glad I over-ordered, rather than under ordered.
Monday, 23 August 2010
Plumbing, framing and a plasterer
Saturday was all hands with my brother & his wife coming around to fit the framing to the kitchen wall, removing the door to the cupboard under the stairs (where the electricity meter and fuseboard live), pulling the plaster off the chimney breast in the dining room (it was falling off anyway).
S continued with the PVA-ing whilst I was in the airing cupboard straightening out some plumbing and fitting yet more wiring conduit. By Saturday evening we had the framing up on all shared walls, and I had made a start on the kitchen plumbing.
Today we had a visit from the plasterer. The original plan was that he'd be plastering the ceilings this weekend, however as the schedule had slipped some we had to put him off, and re-work a new timetable.
 The rest of the day was largely concerned with kitchen plumbing, S had been dispatched for building supplies whilst I fired up the gas torch and dug out the solder. By the evening we had running (and not dripping) cold water in the kitchen again. Just the hot water and the waste to do..
Saturday, 21 August 2010
We have ignition
Today we had the return of the electricians to complete first fix, and also the gas fitter (a stand-in as the original fitter has been taken ill) to complete the heating installation.
We also had the gas suppliers come out to fit the gas meter, and a delivery of plasterboard from our preferred DIY supplier. This involved a 28ton truck, with Hi-ab, and blocking the passage of traffic through the entire estate wilst the delivery was made.
Both S and I were around, so there was a house-full. By mid afternoon we had a working heating and hot water system - another milestone reached! I was concerning myself with fitting the extractor ducting and putting a large hole in the wall for the outlet.
 My brother came by that evening to help me shift the plasterboard into the house (it's all 8x4 sheets and very heavy). S has been largely occupied with painting the shared wall with several coats of thick PVA in an attempt to control some of the odours that seep through - it's not just noise that's an issue with next door.
 My brother came by that evening to help me shift the plasterboard into the house (it's all 8x4 sheets and very heavy). S has been largely occupied with painting the shared wall with several coats of thick PVA in an attempt to control some of the odours that seep through - it's not just noise that's an issue with next door.
At the moment the boards are just piled up wherever, we'll have to move them around to work on each area, bit of a chore, but no other alternative.
Friday, 20 August 2010
Gas gas gas!

The gas transport company (wales & West) came out to fit the gas supply today, which went quite well, though they did manage to disturb one of BT's phone cables that crossed the route of the gas pipe, resulting in no phones for half the street.
Thankfully ours was okay. I spent most of the day finishing off more wiring chases, and installing socket boxes and tube for network and tv outlets.
Thursday, 19 August 2010
Appliances..
Today saw the oven and hob being delivered to me here at work, which we managed to squeeze into the back of the blue-dude for the trip home. Yet more struggling got it out again and they now sit in the living room, on a wheeled dolly for easy pushing around.
No idea when they'll make it out of the wrapping. Guess we'll be cooking on the camping stove for a little while yet. At least we can say we have an oven now.
No idea when they'll make it out of the wrapping. Guess we'll be cooking on the camping stove for a little while yet. At least we can say we have an oven now.
Monday, 16 August 2010
Digging the garden

Both digger & skip arrived on friday, the skip whilst I was out running a (pointless) errand, though thankfully the electricians were in so they signed for it. I got a prettty brief description of how the digger worked from the hire delivery driver, and then was left to it.

A small amount of trench was started on friday afternoon/evening, on reaching the required depth the first things I dug up were a ceramic drain, and several tonnes of bricks. I get the impression tha the foundations and plumbing from the old huts of the POW camp were simply buried under about a foot of topsoil, and also fairly well embedded in the clay that this place is built on. There also appeared to be a fairly uniform layer of flat sandstone-coloured stones at between 12 and 18inches deep, I'm guessing these may be the old floors of the huts.

Alas no buried treasure, secret tunnels or other interesting WW2 artifacts were found.
Saturdays digging was a lot more productive, having mastered (to a point) the controls, and also knowing what to expect down there, progress was a little more rapid. S spent a large amount of the day sifting through what I'd dug up, removing the larger stones, bricks, and slabs of concrete. When she got bored of that, she set to pruning the pampas, in preparation for it's final destruction.
My brother & his wife showed up about 5ish with his chainsaw then chopped down the remains of the dead cherry tree, chopping it up into nice, fire sized logs which we put aside for when we get a working fireplace again. He then set about chopping up the pampas grass with the chainsaw, which he admitted was a first for him.

Mid pruning a wasps nest was found in the pampas, which we dispatched with a gas-torch. We then had to extinguish the pampas which, as you can imagine, burned pretty well - this was mostly out of concern for the phone line that ran above it.
Once the last of the trench was dug, or could be dug with the digger, it was then turned over to digging up the remains of the pampas, of which everyone had a go, but my Sister-in-law proved the most proficient.
We wound things up around 8ish, scrubbed up, and headed off for a curry.
The following day was started with a trip to our favourite DIY stoer to buy wall insulation, which they didn't have, and look at doors, which they did have, but we didn't buy. The afternoon was spent tidying up the remains of the trench, extracting a lump of concrete from under the hedge at the front of the garden, as well as breaking up the concrete path immediately in front of the house under the meter box. Meanwhile S set to removing the odd shaped glass from between the living room and the stairs, this we will replace with glass-bricks or something similar, we think.
Friday, 6 August 2010
Framing going up
 Started installing the framing for the false walls.
 Borrowed a mitre-saw from my brother, it's handy, but the calibration is out- the 0degree detent is slightly skew.
Things are being complicated slightly by the fact that the front bedroom is being used to store all the fiberglass loft insulation. I've no idea what to do with it right now, there's tons of it, so I've just dumped it where there's space- the same room I'm trying to build a wall.


Also got the boiler going in this week, though it won't be working until the gas supply is connected up, and that's not til the 19th Aug.
Thursday, 5 August 2010
Alien eggs

Bit like a scene from Aliens..
They also move around on their own, though I think this is due to the gas fitter working in that room during the day and having to move the bags around to access the relevant floorboards..
A boiler - woo!


Its on the gable-end, with the flue vented out through the wall under the eaves. It connects to the rest of the house plumbing via the airing cupboard, which has mains cold water, as well as DHW and CHS pipework from the old system.
Thoughtfully there's also a pressure gauge and a filling loop fitted at that level, rather than having to scuttle up into the loft to check such things.
Sunday, 1 August 2010
Last of the ceiling down
Pulled the ceiling down in the front room this weekend. Figured it would be easier for the electricians to install the cabling, than working through floorboards, and it would mean we retain the use of all the rooms upstairs.
Interestingly enough you can get approximately 20sq m of artexed ceiling into the boot of a 3-series bmw. I know, cos I did it. Said BMW is also now sporting a set of roof-bars, and is the chariot of choice when collecting anything too long to fit in the blue-dude. The dude is preferably otherwise, being a sensible hatchback.
Also started bagging up and removing the insulation from the loft, this'll make it easier for the electricians to install the lighting upstair, and reduce the risk of someone putting a foot through the ceiling. There's tons of it up there, the regulation 450mm and then some. As the boiler is going up there as well, it makes sense to clear a space for the gas fitter to do his thing as well.
Thursday, 29 July 2010
The last resident moves in

The cat moved in on sunday, and we've been trying to contain him within the house for the first week, so he can get to know the place. However that plan didn't last long.
Colditz cat managed to escape on the second night, Thankfully he is so far content to explore the gardens (front and back) and not much further. So we decided to accelerate the program a bit and spend some time with him outside. Last night he got to know one of the locals, and woke us both up with a slanging match just outside the back door.
The rest of the work is going quite slowly during the week, due to being at work. Next week we have the gas/heating installation starting, which will be some noticeable progress, rather than simply more destruction and mess. We have got a fairly good timetable of events which is leading me to believe that the major work will be completed by the end of august. Hopefully.
Tuesday, 27 July 2010
Wonky wobbly Floors
 The original layout of the house has changed somewhat, internal walls have been removed, giving plenty more space downstairs, however the underlying problem of different floor heights is still with us. I estimate about 10mm drop across the width of the old wall.
You can see the line of the old wall here, along with the differing flooring styles. Nice.
Monday, 26 July 2010
Noise - a solution?
Perhaps not a magic-bullet (I wish), but a start.
We're going to build false walls on all the shared walls, these will be lined with accoustic insulation and clad in special sound-block plasterboard. This will take up to 100mm from each of the affected rooms (kitchen, sitting room, & bedrooms 1 & 2) but I think we can spare that in exchange for our sanity - we heard her copulating the other night - ugh.
I reckon it'll cost about £500 to build the walls, materials being CLS timber, fibreglass, OSB chipboard & 12mm soundblock plasterboard.
Sunday, 25 July 2010
Fire removal
 Spent a merry few hours removing the coal-fire. Blimey, it's heavy.
Not the easiest of tasks as the water connections for the back boiler need to be disconnected before it's removed, which is tricky when they're at the back of the cavity.
It came out eventually though, amist a sea of vermiculite, with both me and my brother swinging on it. A handy wheel-board then made moving it around a bit easier.

I'm not particularly impressed with whoever installed it. To make the fireplace opening big enough to accomodate it, a few bricks were removed from one side - these bricks happen to be supporting the lintel over the fireplace. Thus the lintel is supported on the right hand side by wishful thinking. Given it's not falled down yet, I'm guessing it's not working too hard, however I think I'll stuff a few bricks under it, just to be sure.
The eventual plan for this area is to install an open fireplace. S has a cast iron item that she quite likes, thouhgh it needs repairing before it'll actually work (it's currently repaired with some painted wood - not a good plan for a working fireplace).
Given we've managed to extract the old fire intact, I'll stick it on ebay, saves me humping it to the skip, and might get a few notes for it.
You can also see on the right of the chimney breast where I ran into the capping for the socket below. So much for capping be a vertical drop from services - no idea what they were thinking when they built this place, other than the fact they probably knock off early on a friday.
Friday, 23 July 2010
Noise & neighbours
After a week or so here it's become apparent that the walls are incredibly thin. They're also incredibly poor at noise reduction. It's also become apparent that next door (the terrace side) are also quite noisy. Small children can be forgiven, but when it's the mother screaming at them at all hours, it's something else. I'm sure asking them to be quiet is only going to go so far, after all they're being subjected to listening to our house-wrecking.
On approaching the lady next door to ask when it was the kids bedtime (so we could stop with the noise) the response was vague to say the best:
"They don't really have a bedtime, as it's the holidays I've not really got them into a routine"
Great.
S & I agreed between us that 8pm was an acceptable hour. We'll restrict the noisy operations to before this time during the week.
There's also some distinctly herbal smells coming from that house.
Thursday, 22 July 2010
New Toy
Managed to aquire a Bosch SDS drill with roto-stop, via a contact in the retail industry - bargin price (about 1/3 RRP) and it's the daddy. My new favourite tool. Makes light work of the chasing, though these soft cinderblock walls are hardly a challenge - we'll see what it makes of the engineering-brick on the chimney stack.
Think the single, free chisel might need a few friends, I can't imagine it'll last long. Might pick up a pack of cheap SDS accessories from screwfix.
Think the single, free chisel might need a few friends, I can't imagine it'll last long. Might pick up a pack of cheap SDS accessories from screwfix.
Monday, 19 July 2010
A former resident

Found this petrified corpse above the dining room ceiling.
Ick.
Dining room ceiling is now down and in the skip, along with this former resident.
Friday, 16 July 2010
New look kitchen
 Brother came over today, and we gutted the kitchen. Not bad for a days work. Just the rest of the house to do. Ugh.
We also played with the chaser, wow. It's heavy & cumbersome, the switch is a bit iffy, and it won't cut right up to the ceiling but it doesn't make a speck of dust. The width is set at 40mm which should be fine for most stuff.
We hired an SDS for a couple of days to chisel out the inside of the chases, much quicker than a hammer and bolster, however the only SDS the hire-shop had was a maxi, which is a bit like overkill.
S was at work, so she'll be in for a bit of a suprise when she gets home. She was thinking we'd start on the weekend.
Previous owners came by this evening to remove the rubbush they'd left behind, one more item off the list.
Monday, 12 July 2010
The big move weekend, part 2
Yay! Our first night in the new house. Another 2 van loads, plus accompanying cars, mostly garage stuff this time. Fixed the leaking pipe, though the floorboards aren't down yet, but we're here. Just about.
Anyway. Bed time. Lots more to do tomorrow.
Anyway. Bed time. Lots more to do tomorrow.
The big move weekend
Gathered the family (my brother and his wife) for the big push, a weekend of lugging boxes.
About half way through now. Borrowed a van from work, and managed 2 loads in that yesterday, accompanied by a pair of cars, both also stuffed with, er, stuff.
House is mostly cleared apart from car stuff. Garage has had 2 carloads of stuff removed and still looks no different. Returning today to finish that off, after we've put right a small mishap i had yesterday with a floorboard nail and a heating pipe. Spent the night at Brothers house due to the hasty removal of the floor in our bedroom.
Weather is co-operating nicely. Not too hot and a nice breeze for when things get heavy.
Friday, 9 July 2010
Skippy
Booked a mini-skip to take the kitchen and the kitchen & dining room ceiling. It'll be delivered on a 13ton truck which required a 9ft clear width. Best I measure the width of the drive then.
Thursday, 8 July 2010
Trash - the conclusion?
Got a call from the previous owners, they're coming by to clear all the trash - result! He sounded a bit miffed at the tone of the letter he got, and thought he was doing us a favour by leaving the wood so we could use it as fuel. Guess the estate-agents didn't communicate our intentions to renovate the place.
Tuesday, 6 July 2010
Still clearing out
Still working on getting the garage cleared - you can see the floor now, and I've removed all the cables hanging from the roof. Got 5 big boxes of stuff out on and S didn't notice the difference.
Lots more to do.
Lots more to do.
Saturday, 3 July 2010
Back at the old place
I'm taking a quick breather from efforts on the drive - it's another scorcher here today.
S has taken another car-load of stuff over the bridge, and will be firing up the wallpaper steamer and setting to. I'm holding the fort here. Well, actually I'm putting Dave's car back together - I pulled the engine out a few weeks ago to tackle some tricky welding by the clutch pedal. It's all welded and happier now, but I've just got to re-assemble the rest of it, give it a good wash and then an MOT. At that point I can give it back to Dave with a clean conscience.
We had another visit from the estate agents today to take some photos of the tidier bits of the house so they can advertise it's rental - my own efforts have been largely fruitless so far.
The landline is hopefully is working by now, though we keep forgetting to take a telephone over to test it. Must sort that, as I need to get the broadband working..
Friday, 2 July 2010
Trash, the revenge..
Got the solicitors to draft a letter, I like solicitors when they're on our side:
Further to completion of this matter on the 25th June, our clients have contacted us regarding the appalling condition the property was left in. Our clients have had to contact the Council to arrange for three wheelie bins full of rubbish to be removed. A letter had been delivered to the property dated 25th April to tell the owner that the wrong rubbish had been placed in the wrong bin so that it could not be emptied until the rubbish had been sorted.
There is a large pile of wood to the right hand side of the garage, bits and pieces of old furniture and wood still within the garage and what looks like asbestos sheeting from what was perhaps an old garage roof at the back of the garage. Three photographs evidencing this are attached. There is also a photograph showing two old doors propped up between the coal bunker and the garage. There is a chest of drawers in the third bedroom whilst the garden has been used as a dumping ground for buckets of cement or sand mix, old bits of worktops and
various other rubbish.
As well as dealing with the Council, our clients have to hire a mini skip to remove the rubbish and will have to pay a specialist firm to remove the asbestos.
Your clients are clearly in breach of their contract by failing to provide vacant possession of this property on completion.
Our clients rights against them are reserved. Our clients estimate that the cost of dealing with your clients breach will be £528.75. Please arrange for your clients to reimburse ours direct for this additional expense. If they are unwilling to do so, our clients rights against them are reserved.
Yours faithfully
Scary sounding stuff. Let's see what happens..
Moving stuff over
Back at work now, after a few days off earlier this week to give guided tours of the new place to various electricians and plumbers. Also had the Landlady come over to 'inspect' and talk property matters with estate agents and maintenance contractors - she's putting the place back on the letting market, albeit at a higher rent.
 We're still doing at least one run a day over the bridge to collect post and drop off a car-load of boxes, the pile in the sitting room is growing.

 We're still doing at least one run a day over the bridge to collect post and drop off a car-load of boxes, the pile in the sitting room is growing.
 Last nights trip involved an involuntry break in the unloading for an unexpected downpour, so we put the kettle on (that was in the first run over) and found ourselves picking at spot of loose wallpaper. Well, you know how these thing end up, within 10minutes we'd partially stripped the entire dining room.

Behind a false panel alongside the chimneybreast I found the incoming water stopcock, along with the piping for the coalfire, and a chronological history of the decor of the place, I suspect all the way back to the late 60's. We've got reds, blues, patterned, plain, woodchip and foam textures. I think after all this removal the diningroom will be significantly bigger - I hope it doesn't skew the calculations the gas fitter did for the room volumes..
Another thing we've noticed is there is a different artex pattern in each room of the house. It seems almost a shame to pull it all down, but it's cracked and theres evidence of leaking over the kitchen.
The weekend will see paperstripping in earnest, carpets coming up downstairs, and more serious destruction as the ceilings come down in the back of the house. I'm going to get a rotary disc chaser for cutting out the wire-ways in the walls, these are neat and fast, but produce a ton of dust, so I'll try and get hold of a henry-hoover from work (rather than trash the dyson).
The kitchen units have been ordered and paid for (did I mention that?) and last night we also ordered the fridge-freezer and washing machine. I'm dubious about this as I've a feeling we'll have to install the washing machine in the bathroom whilst the kitchen is getting the 'treatment' The fridge-freezer will go in the conservatory, which is, like the bathroom, largely escaping unscathed.
Thursday, 1 July 2010
The plan
Dividing the work up into 4 major areas, cost wise gives us the following:
The kitchen is pretty straightforward, into a favourite national DIY Chain with some drawings/sketches of layout and get it ordered, demolish old kitchen, dump it in a skip. We'll have a gas supply (see below) so a gas hob and an electric over is the best combination. Saying that I like the sound of these new inductive hobs, expensive though...
The electrics will be pretty involved, and will include chasing new wire-ways into the wall, lots more sockets (1 per room just doesn't cut it these days). New consumer unit with plenty of extra space for expansion. Whilst chasing I'll put extra routes in for network cable, tv co-ax, and other AV stuff.
The heating system will largely be on the advice of a heating engineer, I tried a few calcs with regard to heat losses and radiator efficiency and ended up with numbers ranging from the sublime to the ridiculous. I'll want to over-size the boiler to allow for future expansion, extreme weather conditions and someone running the hot tap whilst I'm in the shower.
I'm tempted to go for a modern storage cylinder with additional heating coils for alternative heat sources- the house roof has an east-west aspect so we could get solar water heaters, or the front garden see's a lot of noon-day sun, so ground source heat-pumps are also an option, though I doubt we'll have the budget for that to start with. It would be good to have the option in a few years, especially if there's subsidies to be had.
The gas supply will be mostly down to the transport company (wales & west) though I can probably save a few quid by digging the trench myself. Perhaps hire an excavator and dig out the pampas grass that's taking over the front garden at the same time.
I always fancied a go on a mini-digger.
The garage will probably follow later in the year once we've got the house sorted and moved in, initially it'll be a storage place for non-essentials whilst we're working on the house. The car(s) will have to be accomodated elsewhere for the duration of the work. The existing garage is a prefab, but has seen a new roof recently, if I can get a few quid for it then that'll help.
The size & shape of the property makes me think I can get a modest double width (16ft) onto the land if I loose the shed and coal-bunker alongside the house. If I sneak the front upto the line of the porch then I can go a bit deeper, which would be nice, though it's iffy ground with regard to planning. I'll need to dig out the old foundations and lay a pretty massive slab (20ft x 20ft), I imagine that'll be quite messy, but more fun on a digger I suspect.
- New Kitchen
- Complete electrical re-wire.
- Install gas supply, new gas combi boiler & replace/upgrade radiators where needed.
- Replace single prefab garage with double prefab (try to sell single garage).
The kitchen is pretty straightforward, into a favourite national DIY Chain with some drawings/sketches of layout and get it ordered, demolish old kitchen, dump it in a skip. We'll have a gas supply (see below) so a gas hob and an electric over is the best combination. Saying that I like the sound of these new inductive hobs, expensive though...
The electrics will be pretty involved, and will include chasing new wire-ways into the wall, lots more sockets (1 per room just doesn't cut it these days). New consumer unit with plenty of extra space for expansion. Whilst chasing I'll put extra routes in for network cable, tv co-ax, and other AV stuff.
The heating system will largely be on the advice of a heating engineer, I tried a few calcs with regard to heat losses and radiator efficiency and ended up with numbers ranging from the sublime to the ridiculous. I'll want to over-size the boiler to allow for future expansion, extreme weather conditions and someone running the hot tap whilst I'm in the shower.
I'm tempted to go for a modern storage cylinder with additional heating coils for alternative heat sources- the house roof has an east-west aspect so we could get solar water heaters, or the front garden see's a lot of noon-day sun, so ground source heat-pumps are also an option, though I doubt we'll have the budget for that to start with. It would be good to have the option in a few years, especially if there's subsidies to be had.
The gas supply will be mostly down to the transport company (wales & west) though I can probably save a few quid by digging the trench myself. Perhaps hire an excavator and dig out the pampas grass that's taking over the front garden at the same time.
I always fancied a go on a mini-digger.
The garage will probably follow later in the year once we've got the house sorted and moved in, initially it'll be a storage place for non-essentials whilst we're working on the house. The car(s) will have to be accomodated elsewhere for the duration of the work. The existing garage is a prefab, but has seen a new roof recently, if I can get a few quid for it then that'll help.
The size & shape of the property makes me think I can get a modest double width (16ft) onto the land if I loose the shed and coal-bunker alongside the house. If I sneak the front upto the line of the porch then I can go a bit deeper, which would be nice, though it's iffy ground with regard to planning. I'll need to dig out the old foundations and lay a pretty massive slab (20ft x 20ft), I imagine that'll be quite messy, but more fun on a digger I suspect.
Wednesday, 30 June 2010
Trash
 We've got quite a pile of rubbish to dispose of. On checking behind garages, in bins and around the back of sheds the extents of the problem is becoming apparent:
Behind the garage is a fair quantity of corrugated concrete roofing, I suspect containing asbestos, I didn't sniff it. Heavy, and difficult to (legally) dispose of.
 The green bin is supposed to be for cardboard and green waste - I don't think topsoil is considered green waste.
Nearly killed me moving it, a wheely-bin full of dirt & rubble is not a light thing.
 Inside the garage I find yet more junk - I was hoping to move less-used boxes straight in here, but unfortunately we'll have to dispose of this lot first.
May talk to the solicitors about this..
Tuesday, 29 June 2010
Electrical discoveries
 A mystery box up near the ceiling of the living-room revealed some tidy, yet ancient, wiring.
It turns out that the wiring topology for the lighting is know by some as a spider layout, where all the permanent connections are commoned up in a single location, rather than at each ceiling rose.

This is the power supply to the conservatory. Nice little bit of 2.5mm T&E poking out of the wall with a 13A plug on the end. Nice.
This later turned out to be a bit of a godsend. But for now it just says bodge.
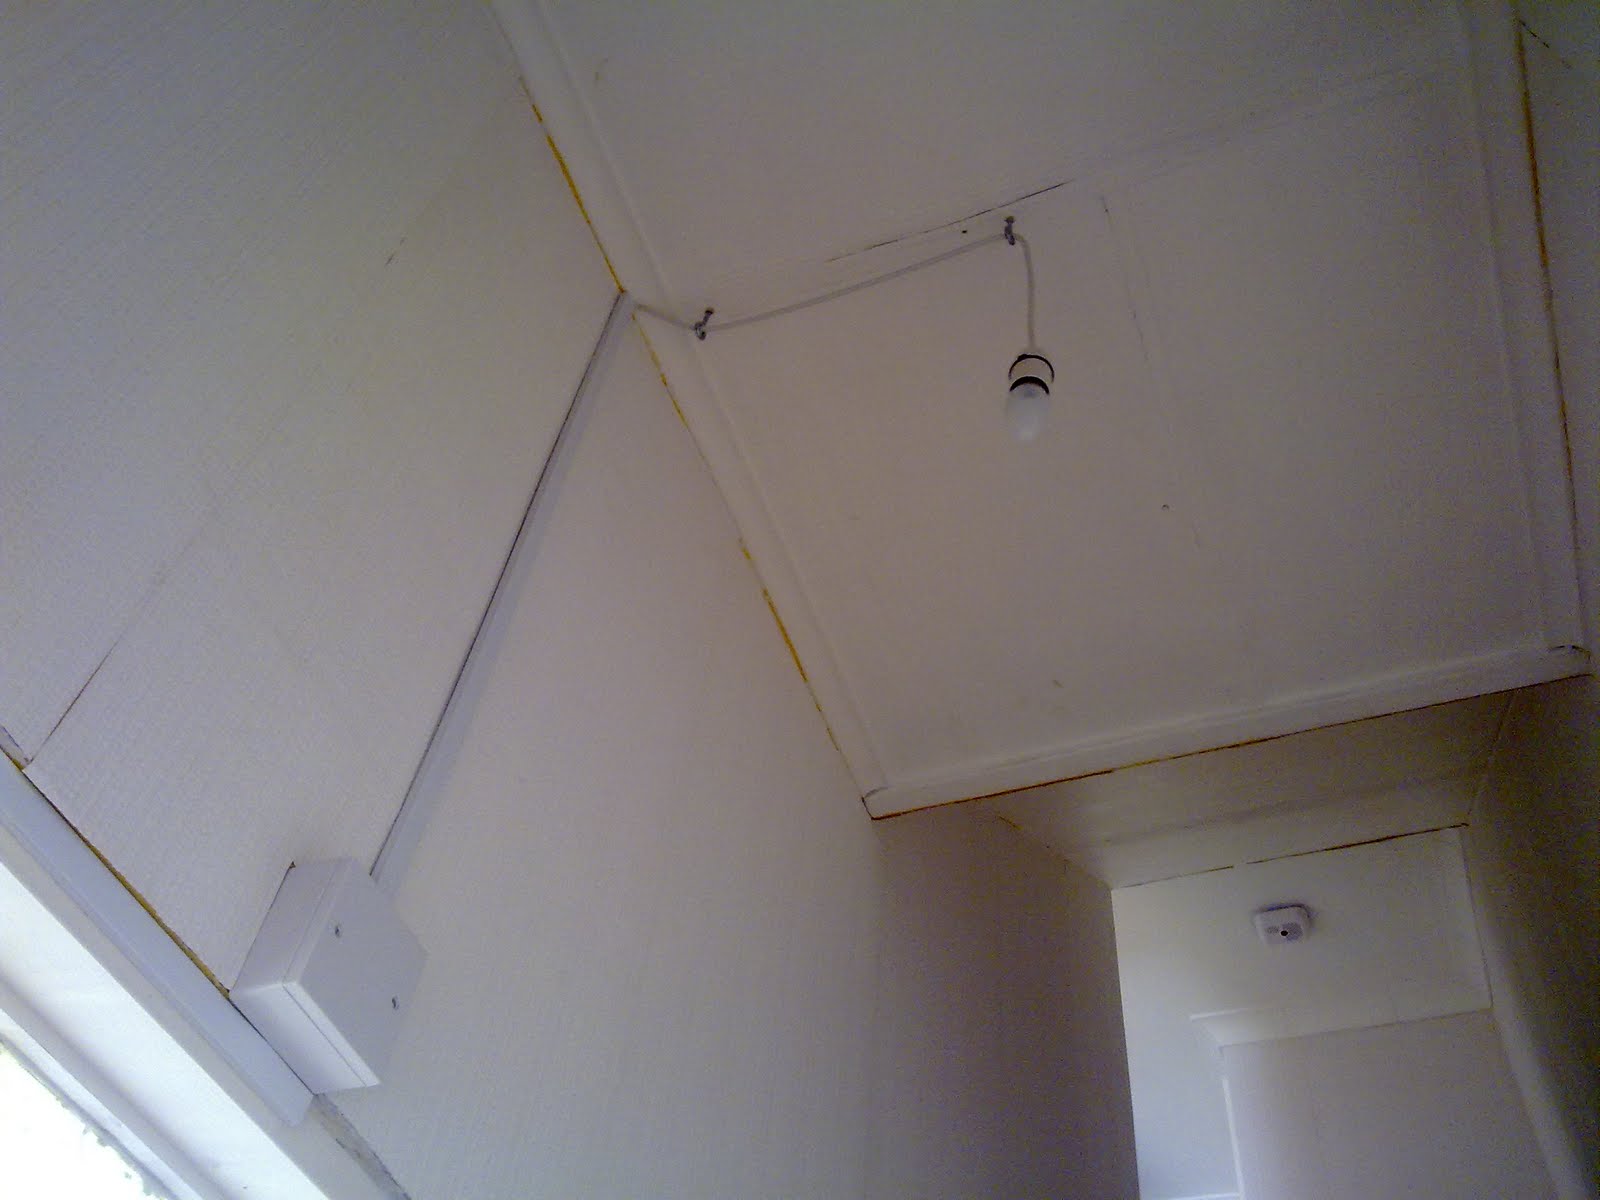 I'm not sure why, but I love the heath-robinson look to this electrical installation. It'll be a pity to get rid of it, but it's really not the look I'm going for.
Subscribe to:
Comments (Atom)